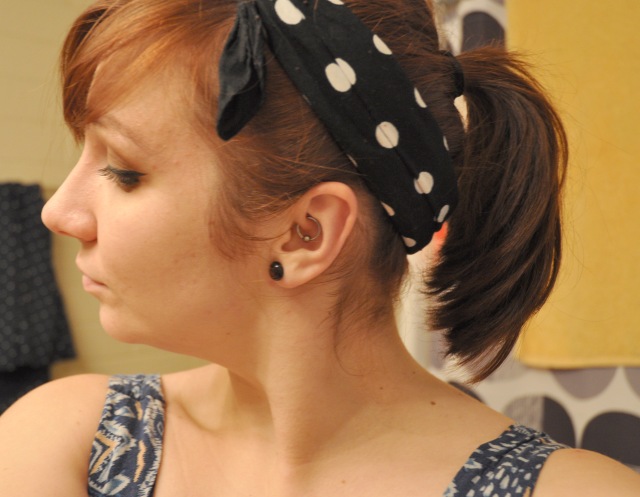
Oh no! So with the blog name transition, our old posts get lost on search engines because they show up with the old blog name. So to help everyone out a little, I’m going to repost a couple popular blogs (they’re also some of my favorites), so here we go:
So I get a lot of questions about how I fold my bandanas to wear in my hair and how I also get them to stay in one place the whole day. I do a lot of rockabilly and retro hair styles and when you add a bandana on top of some victory rolls it is CRUCIAL to make sure you don’t have to reposition your bandana every 15 minutes. So here’s a quick tutorial (it really is quick and simple, I just took lots of pictures) on how to fold and wear it, and rock it all day long!
Start of with a plain old square bandana. You can buy them at places like Walmart or Target, but you usually get stuck with a paisley print, so if you’re looking for something a little different, try a craft store. They not only have solid colors but some fun prints as well and they are super cheap. I got this polka dot one at Hobby Lobby.
Find your corner with a tag. You can either cut this off, or if you’re like me, I just leave it there and make this one of my corner I fold in so no one ever sees it. Make sure you fold this corner in or you’ll end up a tag on top of your head!
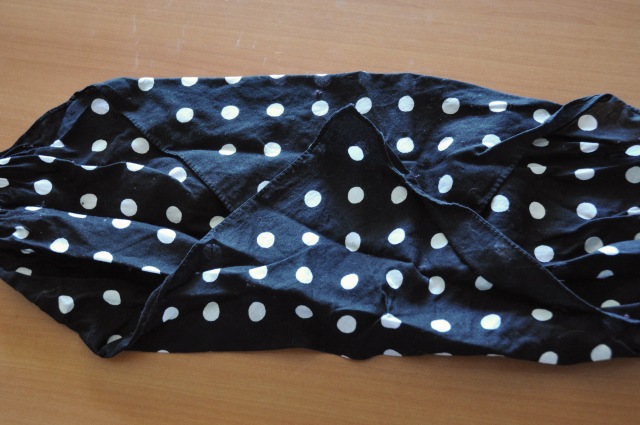
Fold your tag corner and the opposite one and fold them in like this. If you want, you can start at one corner and fold/roll the bandana up, but it looks really chunky and awkward to me, and you usually end up with a little triangle piece hanging off the back of your neck. This method prevents that and also fits the shape of your head better, so less slippage.
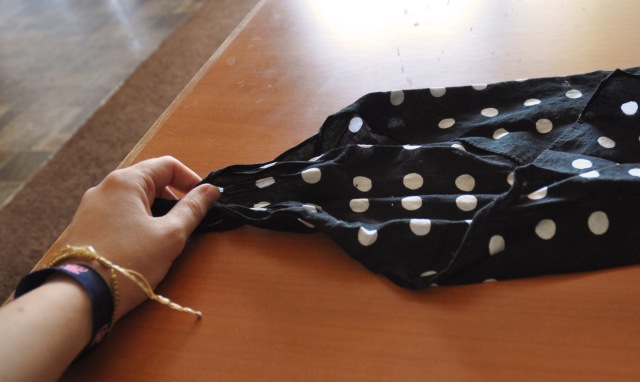
Now this part I can show you super well because I had to use one hand with my camera, but grab each of your loose ends in your hands…
And pull!!! Pull hard enough and it will start to fold the bandana in on itself. If it looks a little bit too wide still, feel free to help it out a little and tuck in some bits here and there but don’t fold it. The loose wrinkly shape is gonna help us style it.
You can do this with your hair down but I always feel it makes the back look weird so I suggest doing this as an updo. So with your hair styled up however you please, place the middle of your bandana at the base of your style. The bottom edge should rest right up against your hairline. Gather your other ends on tops, and prepare your self to knot!
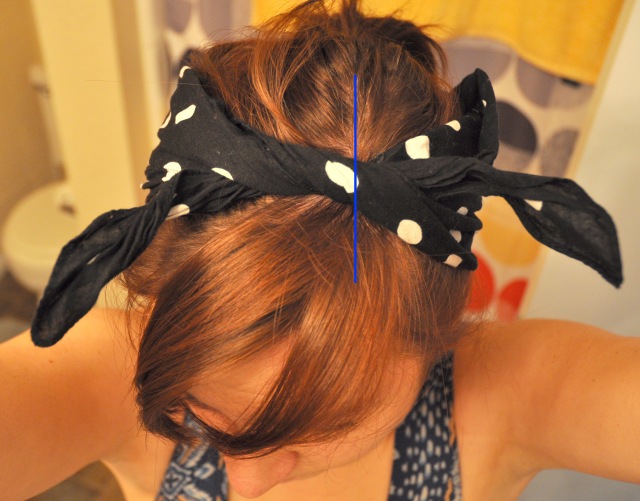
Identify your part line and tie your bandana so it’s center is in line with your part. I drew a blue line to help show you since my part is a little crazy looking with my bangs and ponytail!
Once you have your bandana lined up where you want it, finish your knot off to secure. Make sure it’s tight on your head so it’s not moving around too much, but don’t make it too tight that it’s too small to stay on or will give you a headache during the day! If your ends are poking up and out too much and starting to look like bunny ears, feel free to tuck them under the rest of the bandana to hide them. Mine were nice and flat today so I opted out of this step.
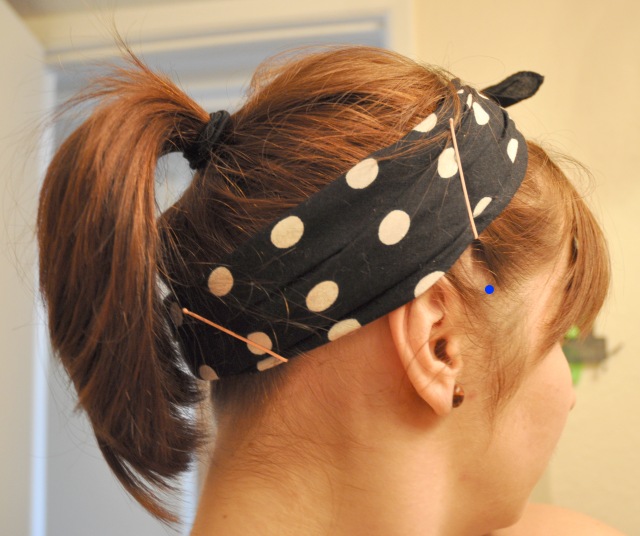
Pinning. This is probably the most crucial step in making sure your bandana stays in place ALL DAY, and is definitely the number one question I get in regards to how to properly wear a bandana. I use a total of four bobby pins to keep mine and place and for the purposes of this tutorial, I used the colored pins from Friday’s tutorial so you can actually see them.
My first two pins are going to be placed on my temple. Starting about where the blue dot is in the picture, I drag the bobby pin to catch all those little hairs in front of me ear and slide the pin up into place. It is crucial that you start in front of the bandana and catch those hair as tight as you can. If you start at the bandana instead, it will not have a taught anchor to secure it in place and will slide back until it is taught against the hairs underneath the bandana. Make sense? It’s like docking a boat. The closer to dock you secure the boat, the less it will move away. At least I think…I don’t know boats all too well.
Same thing goes for the two bobby pins placed on each side of the neck. Since your bandana is closer to your hairline, it doesn’t make as big a difference, but you want to secure them as tightly as you can to your hairline. One on each side of the nape of your neck.
Now you should have four pins in place, securely anchoring your bandana to your head, and you are ready to rock it for the day.
In the future I will show you different styles you can achieve with the bandana again, so I’ll see you soon with more tutorials!!!!
-Mel


